Jcow/开发
Development API[ ]
- section content(),section close()
这两个函数主要是向用户输出内容,用法是:
section_content($content=' '),section($title=' ')
section_content('content in section one')
section_content('Title of section one')
section_content('content in section two')
section_content('Title of section two')
上面代码的产生的输出效果如下:
- client()
用法:client($key=' ')
返回值:当前会话者的关于字段key的值的具体信息
Key字段取值:id,page_id,email,username,fullname,avatar,gender,birthmonth,birthyear,location,var1~var7(自定义的会员个人资料中的字段),如果key的取值为空的话,前面各个取值将一起以一个数组输出。
例子:section_content(
              client('fullname')
       );
- t()
用法:t($str,$alt1=' ',$alt2=' ',$alt3=' ',$godb=0)
$str: 必须填写的,是要显示的字符串
$alt1: 可选的,第一个占位符
$alt2: 可选的,第二个占位符
$alt3: 可选的,第三个占位符
$godb: 可选的,取'真'则表示这一字符串将被输入到数据库中
Example1:section_content(
                 t('hello world')
         );
         输出:hello world
Example2: sectiom_content(
                 t('hello {1},Your username is:{2}',client('fullname'),client('username'))
         );
         如果某用户的fullname是L,username是N的话,则输出为:
           hello L,your username is:N
- jcow_page_feed()
在jcow 个人资料页面或者是社区页面显示streams/feeds
用法:jcow_page_feed($target_id,$args=array()) 返回值:stream ID
$target_id: 必选填写的,目标页面的ID
$args["message"]: 必须填写,订阅信息,少于140字符
$args["name"]: 可选的,链接的名字或者是标题
$args["description"]: 可选的,链接的说明
$args["thumbs"]: 可选的,用逗号隔开的短的URL,最多可填写三个
Example1: jcow_page_feed(user_page_id($user['id'],array('message'=>'logged in');
Example2:  jcow_page_feed($client['page']['id'],array('message'=>'logged in');
- url()
用法:url($uri=,$name = ,$target=)
返回值:一个完全路径的链接地址
$uri: 必须填写,链接的URL
$name: 可选的,链接的标题
$target: 可选的,目标窗口,可取值有:_blank,_self,_top
Example1:  url('blogs');
          输出:http://www.your_site_url/blogs
Example2: url('feed',t('news feed'));
          输出:<a href="http://YOUR_SITE_URL/feed">news feed</a>
Example3: url('http://google.com','google');
          输出:<a href="http://google.com">google</a>
Hooks API[ ]
- 怎样开发Hooks
Hooks函数是写在一个PHP文件里,文件名为YOUR_MODULE_NAME.hook.php,但是Hook文件并不是module组件所必须地
Example:
 modules/test/test.hook.php ,test组件里的hook_boot()函数:
           function test_boot() {
	// do something here
	}
- hook_boot()
某一访问者会话开始时调用该方法,没有返回值,也没有参数
Example:
 modules/test/test.hook.php 中
          function test_boot() {
	// do something here
	}
- hook_header
模板加载时调用该方法,返回值将被写入hearder顶部,没有参数
Example:
 function test_header() {
	// do something here
	return $content;
	}
- hook_footer
模板加载时调用,返回值将被写入footer底部,没有参数
Example:
 function test_footer() {
	// do something here
	return $content;
	}
- hook_u_menu
向个人资料页面添加表单菜单项,没有返回值,参数有:
&$tab_menu:目前个人资料页面的表单菜单
$page: 个人资料页面的数据
字段取值:
$tab_menu['name']: 必须填写,菜单项的名称
$tab_menu['type']: 必须填写,值是:tab
$tab_menu['path']: 必须填写,菜单项的链接
Example:
 function test_u_menu(&$tab_menu,$page) {
	    $tab_menu[] = array(
		'name'=>'Test',
		'type'=>'tab',
		'path'=>'test/profile/'.$page['id']
		);
            }
- hook_page_menu()
向community页面添加制表菜单项,没有返回值,参数、字段取值以及使用方法与上述的hook_u_menu()完全一样。
- hook_page_cache()
用来建立缓存机制,返回值将直接作用于缓存管理器,参数:
$parr: 当前的路径数组
$page: 当前的页面编号(1,2,3...)
$client: 当前的会话用户
返回数组中的字段:
key:页面的唯一关键字
live:可选的,缓存的存在时间
Example:function test_page_cache($parr, $page = 1, $client=array()) {
	if ($parr[0] == 'home' && !$client['id']) {
		return array(
			'key'=>'cache_page_home',
			'live'=>2
			);
	}
 }
定制首页[ ]
- 访客可看到的首页
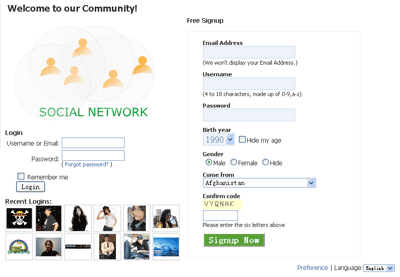
当游客或者是没有登录的会员访问你的站点,将会看到如下页面:
你可以通过编辑/themes/当前使用的主题文件夹/page.tpl.php文件来定制该页面,例如可以定制显示近期的相册、博客、和视频,近期登录的会员等。
- 会员首页
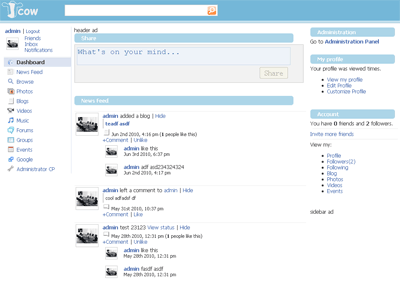
当会员登录时,将会看到类似于下面的页面,通常称为“Dashboard”,可以通过编辑"/applications/dashboard/dashboard.php"文件定制该页面。
主题制作[ ]
如果想定制或者是新制作一个主题的话,可以通过编辑下面两个文件:
"your_theme_folder/page.tpl.php":包含了页面的结构布局显示;
"your_theme_folder/page.css": 包含了页面的主题及样式
组件开发[ ]
操作步骤:
- 新建一个文件夹:"/modules/testapp/"
- 新建一个info文件:"/modules/testapp/testapp.info",示例代码:
name = My Test Module
version = 1.0
description = this is my testing
- 新建一个icon文件:"/modules/testapp/icon.png"(可选择的)
- 新建一个php文件:"/modules/testapp/testapp.php "(文件名必须与文件夹名相同),示例代码:
<?php
 class testapp {
	function index() {
		section_content('Hello world!');
		section_close('Hello title');
	}
	function test() {
		section_content('Hello world2!');
		section_close('Hello title2');
	}
 }
 ?>
- 新建一个Installation文件:"/modules/testapp/testapp.install.php" (Optional),示例代码:
<?php
 function testapp_menu() {
	$items = array();
	$items['testapp'] = array(
		'name'=>'Test menu1',
		'type'=>'community'
	);
	$items['testapp/test'] = array(
		'name'=>'Test menu2',
		'type'=>'personal'
	);
	return $items;
 }
 ?>
- 打开Admin Panel-->Modules,你将会看到"My Test Modules"显示在组件列表中,选中它前面的复选框,点检”update Modules“,你新建的组件即被启用


