什么是自动化运维?自动化运维是指将日常运维的、大量的重复性工作自动化,把手工执行的工作,通过梳理分析,进行逻辑分解,借助平台或工具转为自动化操作。自动化是IT运维工作的升华,IT运维自动化不单纯是一个维护过程,更是一个管理的提升过程,是运维的更高层次,也是未来的发展趋势。
一、自动化运维
1、运维自动化解决的问题
- 项目整体工作效率提升;
- 减少人为误操作;
- 方便信息传递,配置类信息聚合,信息链更完整;
- 事务留痕,方便跟踪,追述;
- 运维工作更加轻松、灵动;
- 提升运维工作价值,管理更多资源,更多服务对象。
2、自动化运维分类工具
- 系统安装:PXE,Cobbler
- 应用程序配置:Puppet,Ansible,Saltstack
- 命令执行与控制:Fabric,Func,Ansible
- 程序发布:git/svn(版本管理),Jenkins/Gitlab-runner(持续集成)
3、自动化运维工具对比
此处只对比Puppet,Ansible,Saltstack
二、Ansible
1、Ansible简介
Ansible是一款使用Python开发,模块化,依赖于ssh协议实现的自动化统一配置管理工具,自动化主要体现在Ansible集成了丰富模块以及功能组件,可以通过一个命令完成一系列的操作,进而能减少重复性的工作和维护成本,可以提高工作效率。
官网地址:www.ansible.com
2、Ansible的优势
安装部署简单(主控端安装ansible,不需要额外安装客户端)
- 基于ssh现有协议实现的 (1.3以上)
- Ansible没有守护进程,不需要启动
- 日志集中在主控端,方便错误排查
- 简单易用,不需要有编程基础
- 通过模块实现,功能强大
3、Ansible架构
- 主机清单Inventory定义Ansible需要操作主机的范围;
- 剧本Playbook Ansible的配置文件,将多个任务定义在剧本中,由ansible自动执行;
- 核心模块Core Modules连接主机实现操作, 它依赖于具体的模块来做具体的事情;
- 自定义模块Custom Modules根据自己的需求编写具体的模块;
- 连接插件Connection Plugins用于连接主机 用来连接被管理端;
- 插件Plugins完成模块功能的补充。
最重要的一点是:Ansible是模块化的,它所有的操作都依赖于模块。
4、Ansible模式
Ansible中有两种模式:分别是ad-hoc模式和playbook模式。
- ad-hoc:简而言之,就是“临时命令”,不会保存;
- playbook:翻译过来就是剧本,在文件中保存执行的流程。
Ansible与SaltStack对比:
相同点:
- 都是使用python语言开发的;
- 都具有二次开发的特性;
- 执行命令都支持Ad-hoc模式 (临时命令,执行完就返回);
- 都可以通过YAML格式文件批量执行;
- 返回的结果都是JSON数据,便于后续处理。
不同点:
- Ansible部署更简单,没有客户端,而Saltstack有客户端;
- Saltstack的响应速度要比Ansible更快;Ansible通过SSH协议实现,Saltstack使用了ZeroMQ实现通信;
- Ansible更加安全,SSH加密传输;
- Saltstack对于Windows支持更友好,Ansible通过Power Shell来管理Windows;
- Ansible维护简单,没有客户端,没有守护进程;saltstack需要有Master和minion,主机要启动一个守护进程。
5、Ansible部署
Ansible部署时直接使用阿里云的基础源与epel扩展源可以直接安装;
# 先拉取epel扩展源
wget -O /etc/yum.repos.d/epel.repo http://mirrors.aliyun.com/repo/epel-7.repo
# 更新yum源
yum makecache fast
# 安装Ansible
yum -y install ansible
# 查看Ansible版本
[root@localhost ~]# ansible --version
ansible 2.9.27
config file = /etc/ansible/ansible.cfg
configured module search path = [u'/root/.ansible/plugins/modules', u'/usr/share/ansible/plugins/modules']
ansible python module location = /usr/lib/python2.7/site-packages/ansible
executable location = /usr/bin/ansible
python version = 2.7.5 (default, Aug 7 2019, 00:51:29) [GCC 4.8.5 20150623 (Red Hat 4.8.5-39)]
(1)Ansible参数
常用参数:
-m #指定使用的模块名称,不指定默认使用command模块
-a #使用的模块参数,模块的具体动作;指定要执行的具体命令
--syntax-check #验证语法
不常用参数:
#不常用参数
--version #ansible版本信息
-v #显示详细信息
-i #主机清单文件路径,默认是在/etc/ansible/hosts
-k #提示输入ssh密码,而不使用基于ssh的密钥认证
-C #模拟执行测试,但不会真的执行
-T #执行命令的超时
-f #一次返回几个结果
ansible帮助命令:
ansible-doc #帮助命令
ansible-doc -l #列出所以的模块
ansible-doc 模块名 #查看模块的详细信息
ansible-doc 模块名 -s #查看模块的选项使用说明
(2)Ansible主机清单
主机资产清单,用于定义被管理主机的认证信息, 例如ssh登录用户名、密码以及key相关信息。
# 查看ansible配置文件路径
[root@localhost ~]# rpm -qc ansible
/etc/ansible/ansible.cfg
/etc/ansible/hosts
- 主机清单位置:默认是/etc/ansible/hosts
- ansible -i 指定主机清单
- 在ansible配置文件ansible.cfg中指定默认的主机清单文件,文件路径:/etc/ansible/ansible.cfg
ansible.cfg常用配置解析:
[defaults]
#inventory = /etc/ansible/hosts #主机列表配置文件
#library = /usr/share/my_modules/ #库文件存放目录
#remote_tmp = ~/.ansible/tmp #临时py文件存放在远程主机目录
#local_tmp = ~/.ansible/tmp #本机的临时执行目录
#forks = 5 #默认并发数
#sudo_user = root #默认sudo用户
#ask_sudo_pass = True #每次执行是否询问sudo的ssh密码
#ask_pass = True #每次执行是否询问ssh密码
#remote_port = 22 #远程主机端口
host_key_checking = False #跳过检查主机指纹
log_path = /var/log/ansible.log #ansible日志
#普通用户提权操作
[privilege_escalation]
#become=True
#become_method=sudo
#become_user=root
#become_ask_pass=False
如果不配置host_key_checking 和 log_path,会导致报错;
不配置host_key_checking 会导致,执行ansible命令的时候报错:
172.16.11.209 | FAILED | rc=-1 >>
Using a SSH password instead of a key is not possible because Host Key checking is enabled and sshpass does not support this. Please add this host's fingerprint to your known_hosts file to manage this host.
配置 log_path 是为了更好的排查问题所在;
(3)主机清单配置规则
(在/etc/ansible/hosts中配置)
主机:
- 可以使用主机名(域名)或IP地址;
- 支持主机名通配以及正则表达式;
- 支持指定主机定义不同的变量,包括密码,端口号,用户等等。
1)单主机配置
# 方式一: ip + 端口 + 用户名 + 用户密码
[root@localhost ansible]# vim /etc/ansible/hosts
[web01]
172.16.11.209 ansible_ssh_port=22 ansible_ssh_user=root ansible_ssh_pass='123123'
[web02]
172.16.10.232 ansible_ssh_port=22 ansible_ssh_user=root ansible_ssh_pass='123123'
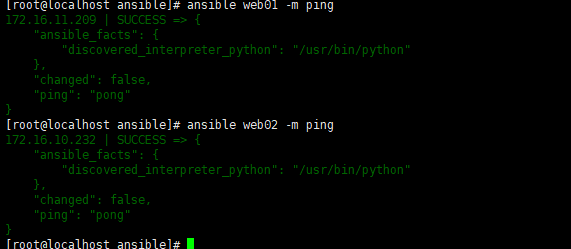
# 测试:ansible 主机名 -m 指定模块
[root@localhost ansible]# ansible web01 -m ping
172.16.11.209 | SUCCESS => {
"ansible_facts": {
"discovered_interpreter_python": "/usr/bin/python"
},
"changed": false,
"ping": "pong"
}
[root@localhost ansible]# ansible web02 -m ping
172.16.10.232 | SUCCESS => {
"ansible_facts": {
"discovered_interpreter_python": "/usr/bin/python"
},
"changed": false,
"ping": "pong"
}
如果遇到以下报错:
- 在ansible.cfg配置文件中开启这两个:(将注释注销了)
- host_key_checking = False #跳过检查主机指纹
- log_path = /var/log/ansible.log #ansible日志
# 方式二: ip + 用户密码
[root@localhost ansible]# vim /etc/ansible/hosts
[web01]
172.16.11.209 ansible_ssh_pass='123123'
[web02]
172.16.10.232 ansible_ssh_pass='123123'
# 测试:ansible 主机名 -m 指定模块
[root@localhost ansible]# ansible web01 -m ping
172.16.11.209 | SUCCESS => {
"ansible_facts": {
"discovered_interpreter_python": "/usr/bin/python"
},
"changed": false,
"ping": "pong"
}
[root@localhost ansible]# ansible web02 -m ping
172.16.10.232 | SUCCESS => {
"ansible_facts": {
"discovered_interpreter_python": "/usr/bin/python"
},
"changed": false,
"ping": "pong"
}
#没有定义用户时,默认使用当前登录用户;
2)多主机配置
#IP+端口+密码
[root@localhost ansible]# vim /etc/ansible/hosts
[web]
172.16.11.209 ansible_ssh_port=22 ansible_ssh_user=root ansible_ssh_pass='123123'
172.16.10.232 ansible_ssh_port=22 ansible_ssh_user=root ansible_ssh_pass='123123'
# 测试:ansible 主机名 -m 指定模块
[root@localhost ansible]# ansible web -m ping
172.16.10.232 | SUCCESS => {
"ansible_facts": {
"discovered_interpreter_python": "/usr/bin/python"
},
"changed": false,
"ping": "pong"
}
172.16.11.209 | SUCCESS => {
"ansible_facts": {
"discovered_interpreter_python": "/usr/bin/python"
},
"changed": false,
"ping": "pong"
}
主机组:
- 嵌套 [组名:children]
- 对组定义变量 [组名:vars]
#主机组变量+主机+密码
[root@localhost ansible]# vim /etc/ansible/hosts
[web_group]
172.16.11.209
172.16.10.232
[web_group:vars]
ansible_ssh_pass='123123'
# 测试:ansible 主机名 -m 指定模块
[root@localhost ansible]# ansible web_group -m ping
172.16.10.232 | SUCCESS => {
"ansible_facts": {
"discovered_interpreter_python": "/usr/bin/python"
},
"changed": false,
"ping": "pong"
}
172.16.11.209 | SUCCESS => {
"ansible_facts": {
"discovered_interpreter_python": "/usr/bin/python"
},
"changed": false,
"ping": "pong"
}
#定义多组,多组嵌套
# webservers组包括两个子组[apache,nginx]
[root@localhost ansible]# vim /etc/ansible/hosts
#定义总ip
[web_group]
172.16.11.209
172.16.10.232
172.16.10.129
#apache有两台
[apache]
172.16.11.209
172.16.10.232
#nginx有一台
[nginx]
172.16.10.129 ansible_ssh_pass='csnginx123'
#定义密码
[apache:vars]
ansible_ssh_pass='123123'
[web_group:children]
apache
nginx
# 测试:ansible 主机名 -m 指定模块
[root@localhost ansible]# ansible web_group -m ping
172.16.11.209 | SUCCESS => {
"ansible_facts": {
"discovered_interpreter_python": "/usr/bin/python"
},
"changed": false,
"ping": "pong"
}
172.16.10.232 | SUCCESS => {
"ansible_facts": {
"discovered_interpreter_python": "/usr/bin/python"
},
"changed": false,
"ping": "pong"
}
172.16.10.129 | SUCCESS => {
"ansible_facts": {
"discovered_interpreter_python": "/usr/bin/python"
},
"changed": false,
"ping": "pong"
}
[root@localhost ansible]# ansible apache -m ping
172.16.11.209 | SUCCESS => {
"ansible_facts": {
"discovered_interpreter_python": "/usr/bin/python"
},
"changed": false,
"ping": "pong"
}
172.16.10.232 | SUCCESS => {
"ansible_facts": {
"discovered_interpreter_python": "/usr/bin/python"
},
"changed": false,
"ping": "pong"
}
[root@localhost ansible]# ansible nginx -m ping
172.16.10.129 | SUCCESS => {
"ansible_facts": {
"discovered_interpreter_python": "/usr/bin/python"
},
"changed": false,
"ping": "pong"
}
除了可以使用密码连接,也可以配置秘钥,实现免密登陆,此时主机配置文件中不需要指定密码。
生成密钥对
[root@localhost ansible]# ssh-keygen
推送公钥
[root@localhost ansible]# ssh-copy-id 172.16.11.209
[root@localhost ansible]# ssh-copy-id 172.16.10.232
这时候配置hosts时就不需要指定密码了。
版权声明:本文为博主原创文章,遵循 CC 4.0 BY-SA 版权协议,转载请附上原文出处链接和本声明。
原文链接:https://blog.csdn.net/liu_chen_yang/article/details/133769300
-

广告合作
-

QQ群号:707632017


